Thursday, 12 January 2012

Executing Android test project with NUnit using CSharp

1.  Build the solution created for the android test project
2.  Download NUnit from http://nunit.org/index.php?p=download and install
3. File>Open Project>add dll of the above project
4. Click on Run
5. Script is executing Android Emulator 

Note: Don't forget to Run android webdriver in Emulator

Writing test script android web applications in Android Emulator using CSharp with Visual Studio

1. Open visual Studio IDE
2. File>New>Project>C# Library Project
3. Go to Project Explorer
4. Click on Add Reference and browse for Android Webdriver Source files
5. Select all files net 35 or net 40 (i.e Depends on Target Framework) and add NUnit Framework.dll to this project
3. Copy the below script into your Visual studio Editor ( Using NUnit Frame work)
using System;
using System.Collections.Generic;
using System.Linq;
using System.Text;
using NUnit.Framework;
using OpenQA.Selenium.Android;
using OpenQA.Selenium;

namespace GoogleAndroidTest
{
        [TestFixture]
        public class AndroidTest
    {
            private IWebDriver driver;
            [SetUp]
            public void setupTest()
            {
                driver = new AndroidDriver("http://localhost:8080/wd/hub");
            }
           [Test]
            public void test()
            {
                driver.Navigate().GoToUrl("http://google.co.in");
                driver.FindElement(By.Name("q")).SendKeys("selenium");
            }
    }
  }


Requirements to write test script for android web applications in Android Emulator using CSharp with Visual Studio IDE

1.Download SDK from http://developer.android.com/sdk/index.html and follow the instruction to install SDK
2.Download android server from http://code.google.com/p/selenium/downloads/list
Copy this into C:\Program Files\Android\android-sdk\platform-tools this path.
3. Install android server using Command Prompt. Go to the above path and install by usiing the command
Go to the C:\Program Files\Android\android-sdk\platform-tools and execute below command
adb install android-server-2.13.0.apk 
After installation we will get the webdriver icon in application list


4. Click on webdriver icon then we'll get message like webdriver ready or Jetty started
5. Settings in Android Emulator:
Go to Settings > Developer Options > Select all three Check boxes
      USB Debugging
      Stay Awake
      Allow Mock Locations


6.Open command prompt
7. Go to the platform-tools folder in android SDK installation path  C:\Program Files\Android\android-sdk\platform-tools
8. Forward port number using below command
adb forward tcp:8080 tcp:8080
9. Pass the url http://localhost:8080/wd/hub/ to check android server is running in your local machine or not. If it is running properly we will ge the below screen. (Before going to this start android webdriver in emulator)


Friday, 6 January 2012

Run Android Project to test Google Search in Eclipse

1. Settings in Android Emulator:
Go to Settings > Developer Options > Select all three Check boxes
      USB Debugging
      Stay Awake
      Allow Mock Locations


2.Open command prompt
3. Go to the platform-tools folder in android SDK installation path  C:\Program Files\Android\android-sdk\platform-tools
4. Forward port number using below command
adb forward tcp:8080 tcp:8080
5. Pass the url http://localhost:8080/wd/hub/ to check android server is running in your local machine or not. If it is running properly we will ge the below screen. (Before going to this start android webdriver in emulator)


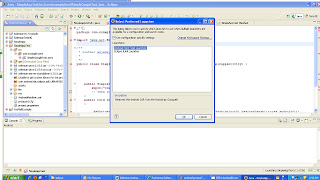
6. Now run the project. Run Project as > JUnit Test >Check on Use Configuration Specific settings> Select Android JUnit Test Launcher > OK
7. Go to emulator. Check script is executing in emulator.

-

Creating Android driver project to test Google Search in Eclipse


Open Eclipse IDE
Follow the below steps to create a project

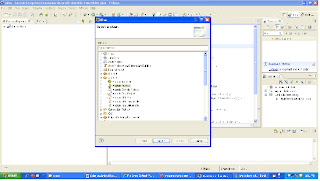
1. New> Other > Android> Android Project


2. Enter the below details
Project name:
The name of the folder where your project will be created.
Click Next
Build Target:
You want to choose as low of a version as possible unless you absolutely need to use something in a later API.
Click Next
 

Application name:
This is the human-readable title for your application — the name that will appear on the Android device.
Package name:
This is the package namespace (following the same rules as for packages in the Java programming language) where all your source code will reside.
Create Activity:
This is the name of the first Activity that will be generated in the src folder.
Min SDK Version:
This is an integer that indicates the minimum API Level required to properly run your application:
Click Finish

3.Select project from Project Explorer> Right Click> Go to Build path > Configure Build Path>  Add External JARs> Select jar files in extracted selenium web driver java source.


4. Select project from Project Explorer> Right Click> Go to Build path > Configure Build Path>libraries > Add Library>select User Library>Next>Click User Libraries> Click on New>Enter name of user library >OK>Click Add Jars>Select all jar files in libs folder of extracted selenium web driver java source> Click OK


Click on AndroidScriptActivity.java > Editor will open> Write the below script in Editor


import junit.framework.TestCase;
import org.openqa.selenium.By;
import org.openqa.selenium.WebElement;
import org.openqa.selenium.android.AndroidDriver;


public class AndroidScriptActivity extends TestCase {
    public void testProjectActivity() throws Exception{
      AndroidDriver driver=new AndroidDriver();
      driver.get("http://google.co.in");
      WebElement element=driver.findElement(By.name("q"));
      element.sendKeys("selenium");
      element.submit();
      System.out.println("The page Title is "+driver.getTitle());
     }

Wednesday, 4 January 2012

Requirements to Create Android Webdriver Test Project in Eclipse

Before creating android project we need to have the following installations in our system 

1. Download JDK 5 or JDK 6and install in our system. Set path by following instructions in  http://www.java.com/en/download/help/path.xml
2. Download SDK from http://developer.android.com/sdk/index.html and follow the instruction to install SDK
3. Follow the procedures in below the link to download and install ADT plugin for eclipse.
 http://developer.android.com/sdk/eclipse-adt.html
 Screen shot look like


4.Download android server from http://code.google.com/p/selenium/downloads/list
Copy this into C:\Program Files\Android\android-sdk\platform-tools this path.
5. Install android server using Command Prompt. Go to the above path and install by usiing the command
adb install android-server-2.13.0.apk 
After installation we will get the webdriver icon in application list

6. Click on webdriver icon then we'll get message like webdriver ready or Jetty started

Friday, 25 November 2011

Different setup fixtures for different browsers in selenium webdriver using NUnit Framework

 public abstract class testwithMultiBrowser
    {
        protected IWebDriver driver;
        [Test]
        public void test()
        {
            driver.Navigate().GoToUrl("http://google.co.in");
        }
    }
  [TestFixture]
  class testwithFirefox:testwithMultiBrowser
    {
      [SetUp]
      public void firefoxSetup()
      {
          driver = new FirefoxDriver();
          IWindow window = driver.Manage().Window;
          window.Size = new Size(1366, 768);
      }
      [TearDown]
      public void tearDown()
      {
          driver.Quit();
      }
    }
    [TestFixture]
    class testwithIE:testwithMultiBrowser
    {
      [SetUp]
      public void iesetUP()
      {
          driver = new InternetExplorerDriver();
      }
      [TearDown]
      public void tearDown()
      {
          driver.Quit();
      }
 }